Buell Knock Off Turn Signals AKA Directional Indicators
Another modification I made to my 1989 Suzuki GS500E,was to replace those hideous flapping arms that Suzuki dubbed turn signals.Those things turn into junk in a few years.They are durable, but their flexibility is their undoing.I could feel those things flapping around on rough roads.They had to make an exit to the spare parts box.I really couldn't decided what turn signals I wanted.I liked the LED units but they were tiny,not very bright during the day,and kind of pricey.I wanted something that went with the theme of my bike,low key corner carver.While I was on the GStwins forum,I seen where someone mentioned installing Buell turn signals for roughly $14 per signal from the dealer.I went to a couple dealers, and all of them wanted $90+ per turn signal!I was still required to buy the mounting hardware to install them.No way am I spending nearly $400 for turn signals for a $1000 motorcycle.So off to Ebay.While trolling the listings for turn signals,I saw a listing for four new turn signals for $14.99 plus 3.99 shipping.I go visit the listing, and the turn signals were so close to the Buell turn signals,I bought them.They are half the length of the Suzuki GS500E factory turn signals,better shape,better looking,and way brighter.They also have clear smoked lens on them.Perfect!They fit the theme of my motorcycle to a T.
First thing to understand about single filament light bulbs(AKA two wire turn signals),they don't care which way the electricity flows through them to produce light.As long as the two wires connect back in place where the factory turn signals were disconnected,they will work.However,I like to make the connections a little better and lasting longer.Before fitting the turn signals to the motorcycle,I check to make sure the bullet connectors will fit tight.The open ended connector can be squeezed with a pair of pliers to tighten up the connection.Once that is taken care of,I start fitting the signals.All four are the same.On the mounting posts,there is a little locator ball.These I cut off with a sharp razor knife.Now lets install them.
To start the install,I like to install the hardest set of turn signals first.The front ones are the hardest, because the entire headlight has to be removed to access the connections to the factory turn signals.If you don't have a service manual,you need one.Check this blog page.I should have a listing to two different service manuals.It explains how to remove the headlight better than I can,but I will try.First,locate the two screws on the lower sides of the headlight trim ring.They look like philips screws, but they are in fact JIS screws.If you're careful,you can remove them with a #2 philips screwdriver.Be aware that the headlight is mounted to the trim ring.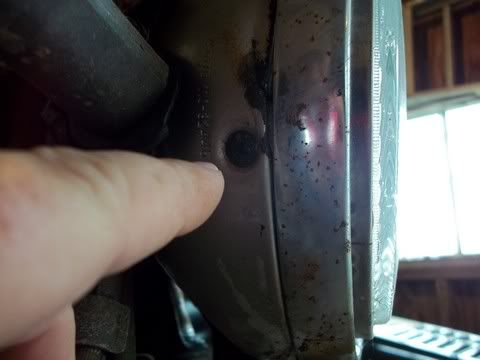
Gently pull out on the bottom of the trim ring.The top of the trim ring is held on by a little bracket that acts like a hinge.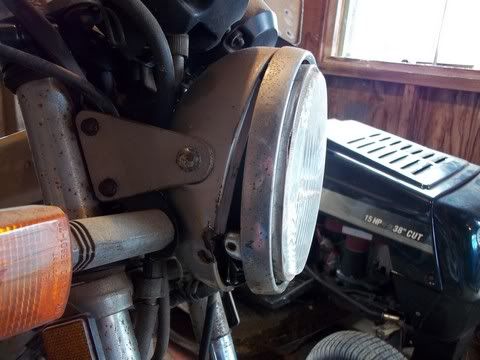
Once the bottom of the trim ring is away from the headlight bucket,push up gently.The ring will pop off,so make sure you are holding on to it.Now disconnect the headlight from the wiring.It slides right off, but requires a little effort to get the connector loose.Set the headlight aside and out of the way.They are extremely expensive and hard to find if they get broken.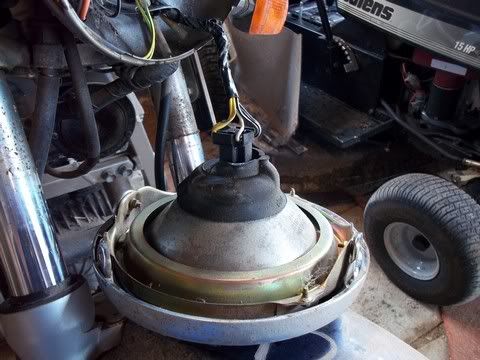
Now comes the fun part,locating the turn signals wires inside that mess of spaghetti in the headlight bucket.Two ways I have done it.1)Find the wire exiting the back of the turn signal at the mount.Wiggle the wires until you find them inside the headlight bucket.2)Remove the turn signal from it's mount.Gently pull it away from the headlight bucket, while watching for the turn signal wires to move in the headlight bucket.Either way you chose,when you find the wires inside the headlight bucket,wrap tape around both sets of wires.Only remove one signal at a time.
When installing the new signal light,refer to my post above about checking the connections.Once that's done,thread the wires through the front signal mount,and loosely install.Fish the wires through the headlight bucket.Before connecting them,apply dielectric grease to the connectors.Any auto parts store has it for a few dollars.It prevents corrosion and helps the connection pass power through it.Do not tighten the turn signal down to it's mount yet.Install the other signal the same way as the first.Once you have both signals loosely installed,step back about 50 feet and have a look at them.Most people set their signals to match the angle of the headlight.This is not the best way in my opinion.I set mine perpendicular to the ground.If they're perpendicular to the ground, everyone will see them clearly.If you don't know what perpendicular means,let me state it this way.If the bike is on dead level ground,the face of the turn signal will be at a 90 degree right angle to the ground,and facing straight out.Now that the signals are pointing straight,snug down the mounting nuts.The washers will lock the nuts so don't over tighten them.Now admire your handy work.
Went from this.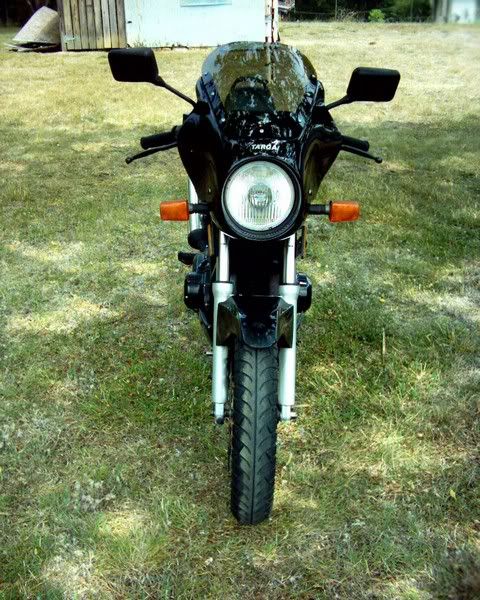
To this.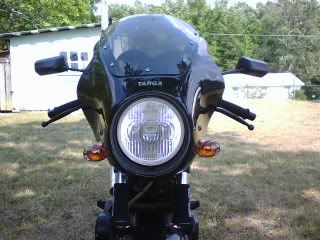
Now onto the rear.These are the easiest to do,but you need to decide where to mount them.If you plan to do a fenderectomy,what stage of fenderectomy do you plan to do?If you do a full high fenderectomy,you will need to drill new turn signal mounting hole in a different location.If you do a half or one quarter fenderectomy,you can mount the new turn signals in the factory turn signal location.I mounted mine back and up.For this,I am going to go out on a limb, and assume most people will use the factory location.Using the factory location,you will need four fender washers.Any local hardware store will have them.Take your new turn signals so they can match them up to the mounting studs.Get a cheap can of flat black spray paint.Clean the fender washers really good with dish soap and a brush.Allow them to dry and wipe them down with rubbing alcohol.Once the fender washers are wiped down,don't touch them with your bare fingers.The oil from you skin will cause the paint to lift.Give the fender washers a few light coats of black paint, and let them dry while you prep the motorcycle for the turn signal upgrade.Remove the seat.Follow the turn signal wires to where they disconnect and disconnect them.There should be no other wires close by with the same type connectors.Can't go wrong here.Now remove the old turn signals and file them away in the spare parts box.When you install the new signals,do it the same ways as the front ones,except use a fender washer on the inside and outside of the mounting hole.Connect the wires using a little dielectric grease and admire your work.
Before.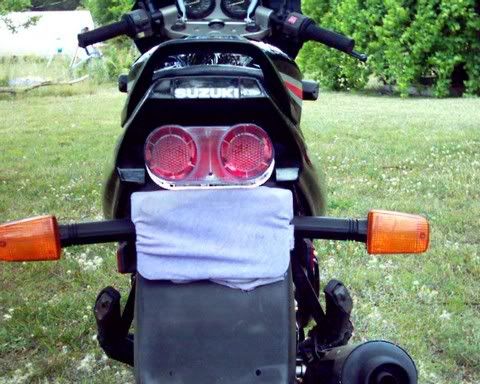
And after.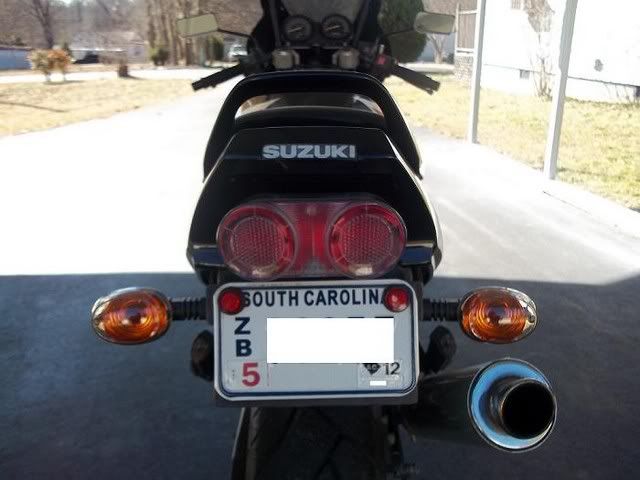
Links below for low priced turn signals and electronic relay.
Buell Knock Off Turn Signals
Buell Knock Off Turn Signals
Tridon EL12 Flasher Relay
Tridon EL12-C Flasher Relay
CLICK FOR MY FENDERECTOMY PAGE.
Buell Knock Off Turn Signals AKA Directional Indicators
This entry was posted on at 6:05 PM and is filed under buell turn signals, directional indicators, flasher relay, flashers, gs500e, gs500f, modifications, reflectorectomy, splash well, suzuki, turn signal relay, turn signals, upgrades. You can follow any responses to this entry through the RSS 2.0. You can


